
HELP CENTER
How Can We Help You?


For Owner
How to set up a company?
LAST UPDATE
2/28/2025 2:01 PM
Welcome to the company setup overview.
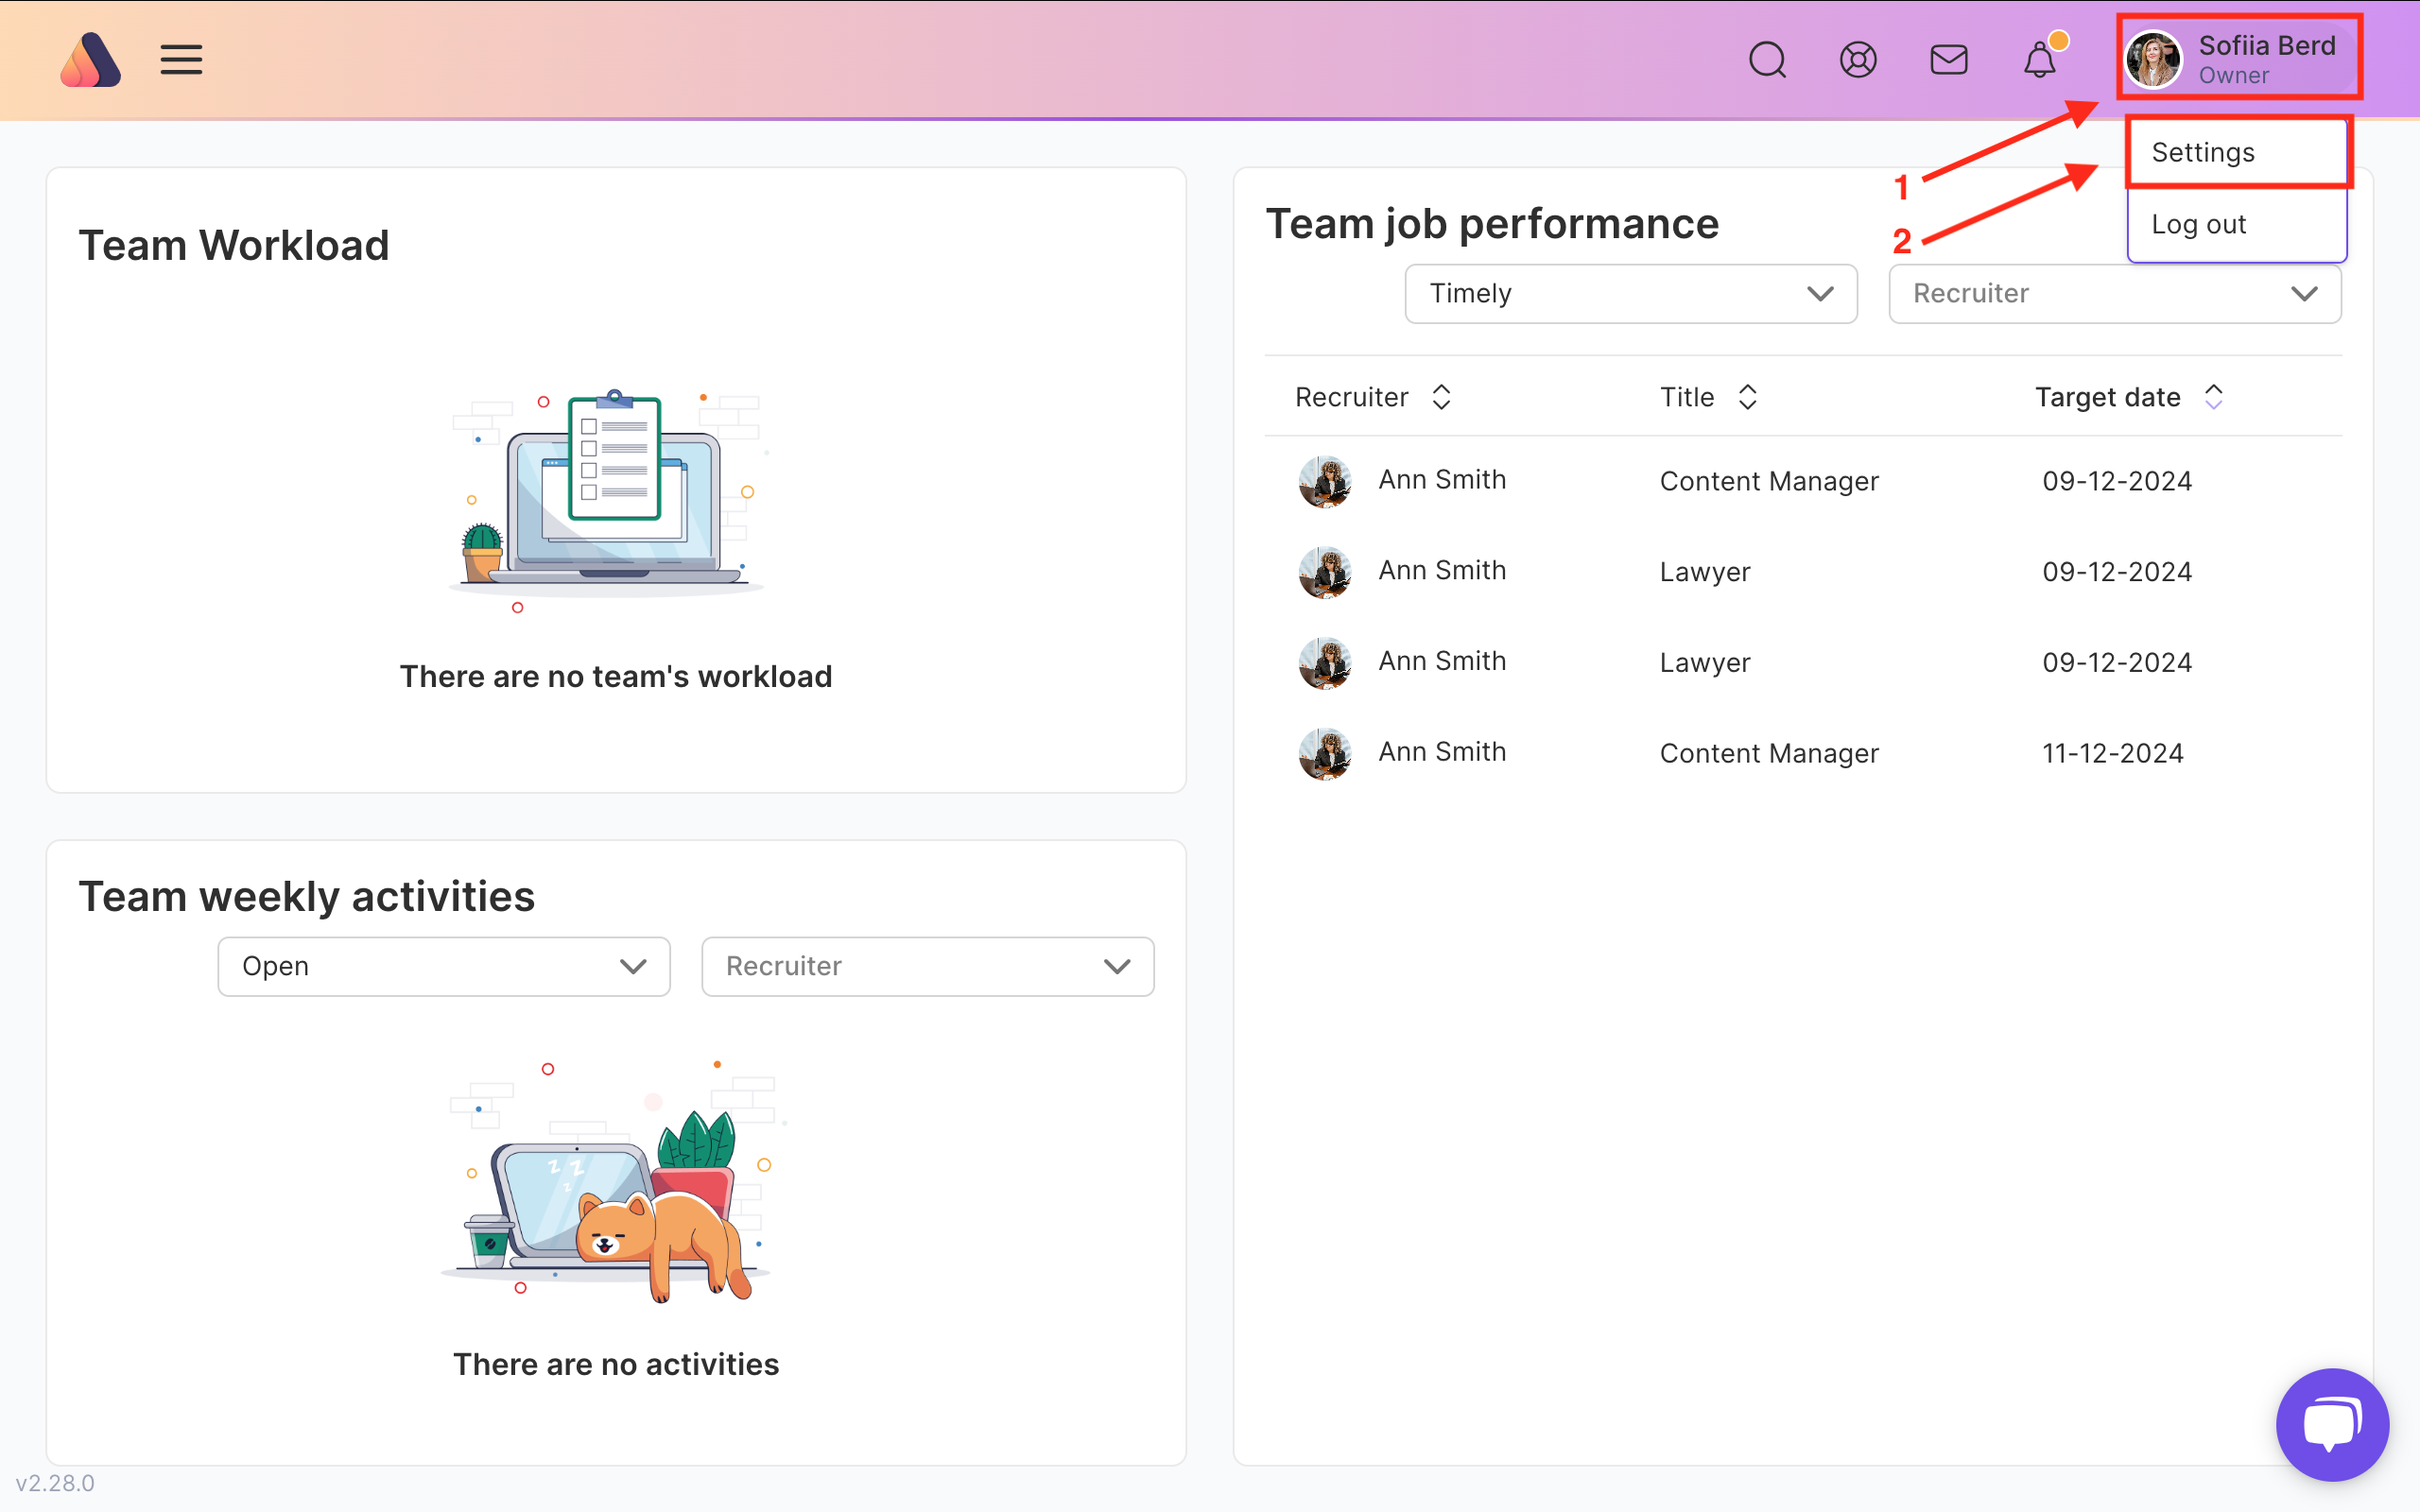
In this post, you will find out about all settings you can apply to your company in Axterior. To start making set-ups, log in to your Axterior account and click on Settings at the top right corner.
You’ll get a list of the available settings. The first one in Company settings is General. Click Edit button to setup this block.

They include General settings like organization name, industry, company size, logo, and offices. As well as Localization settings: location, language, time zone, and start weekday. Don’t forget to click the Save button when you finish editing.

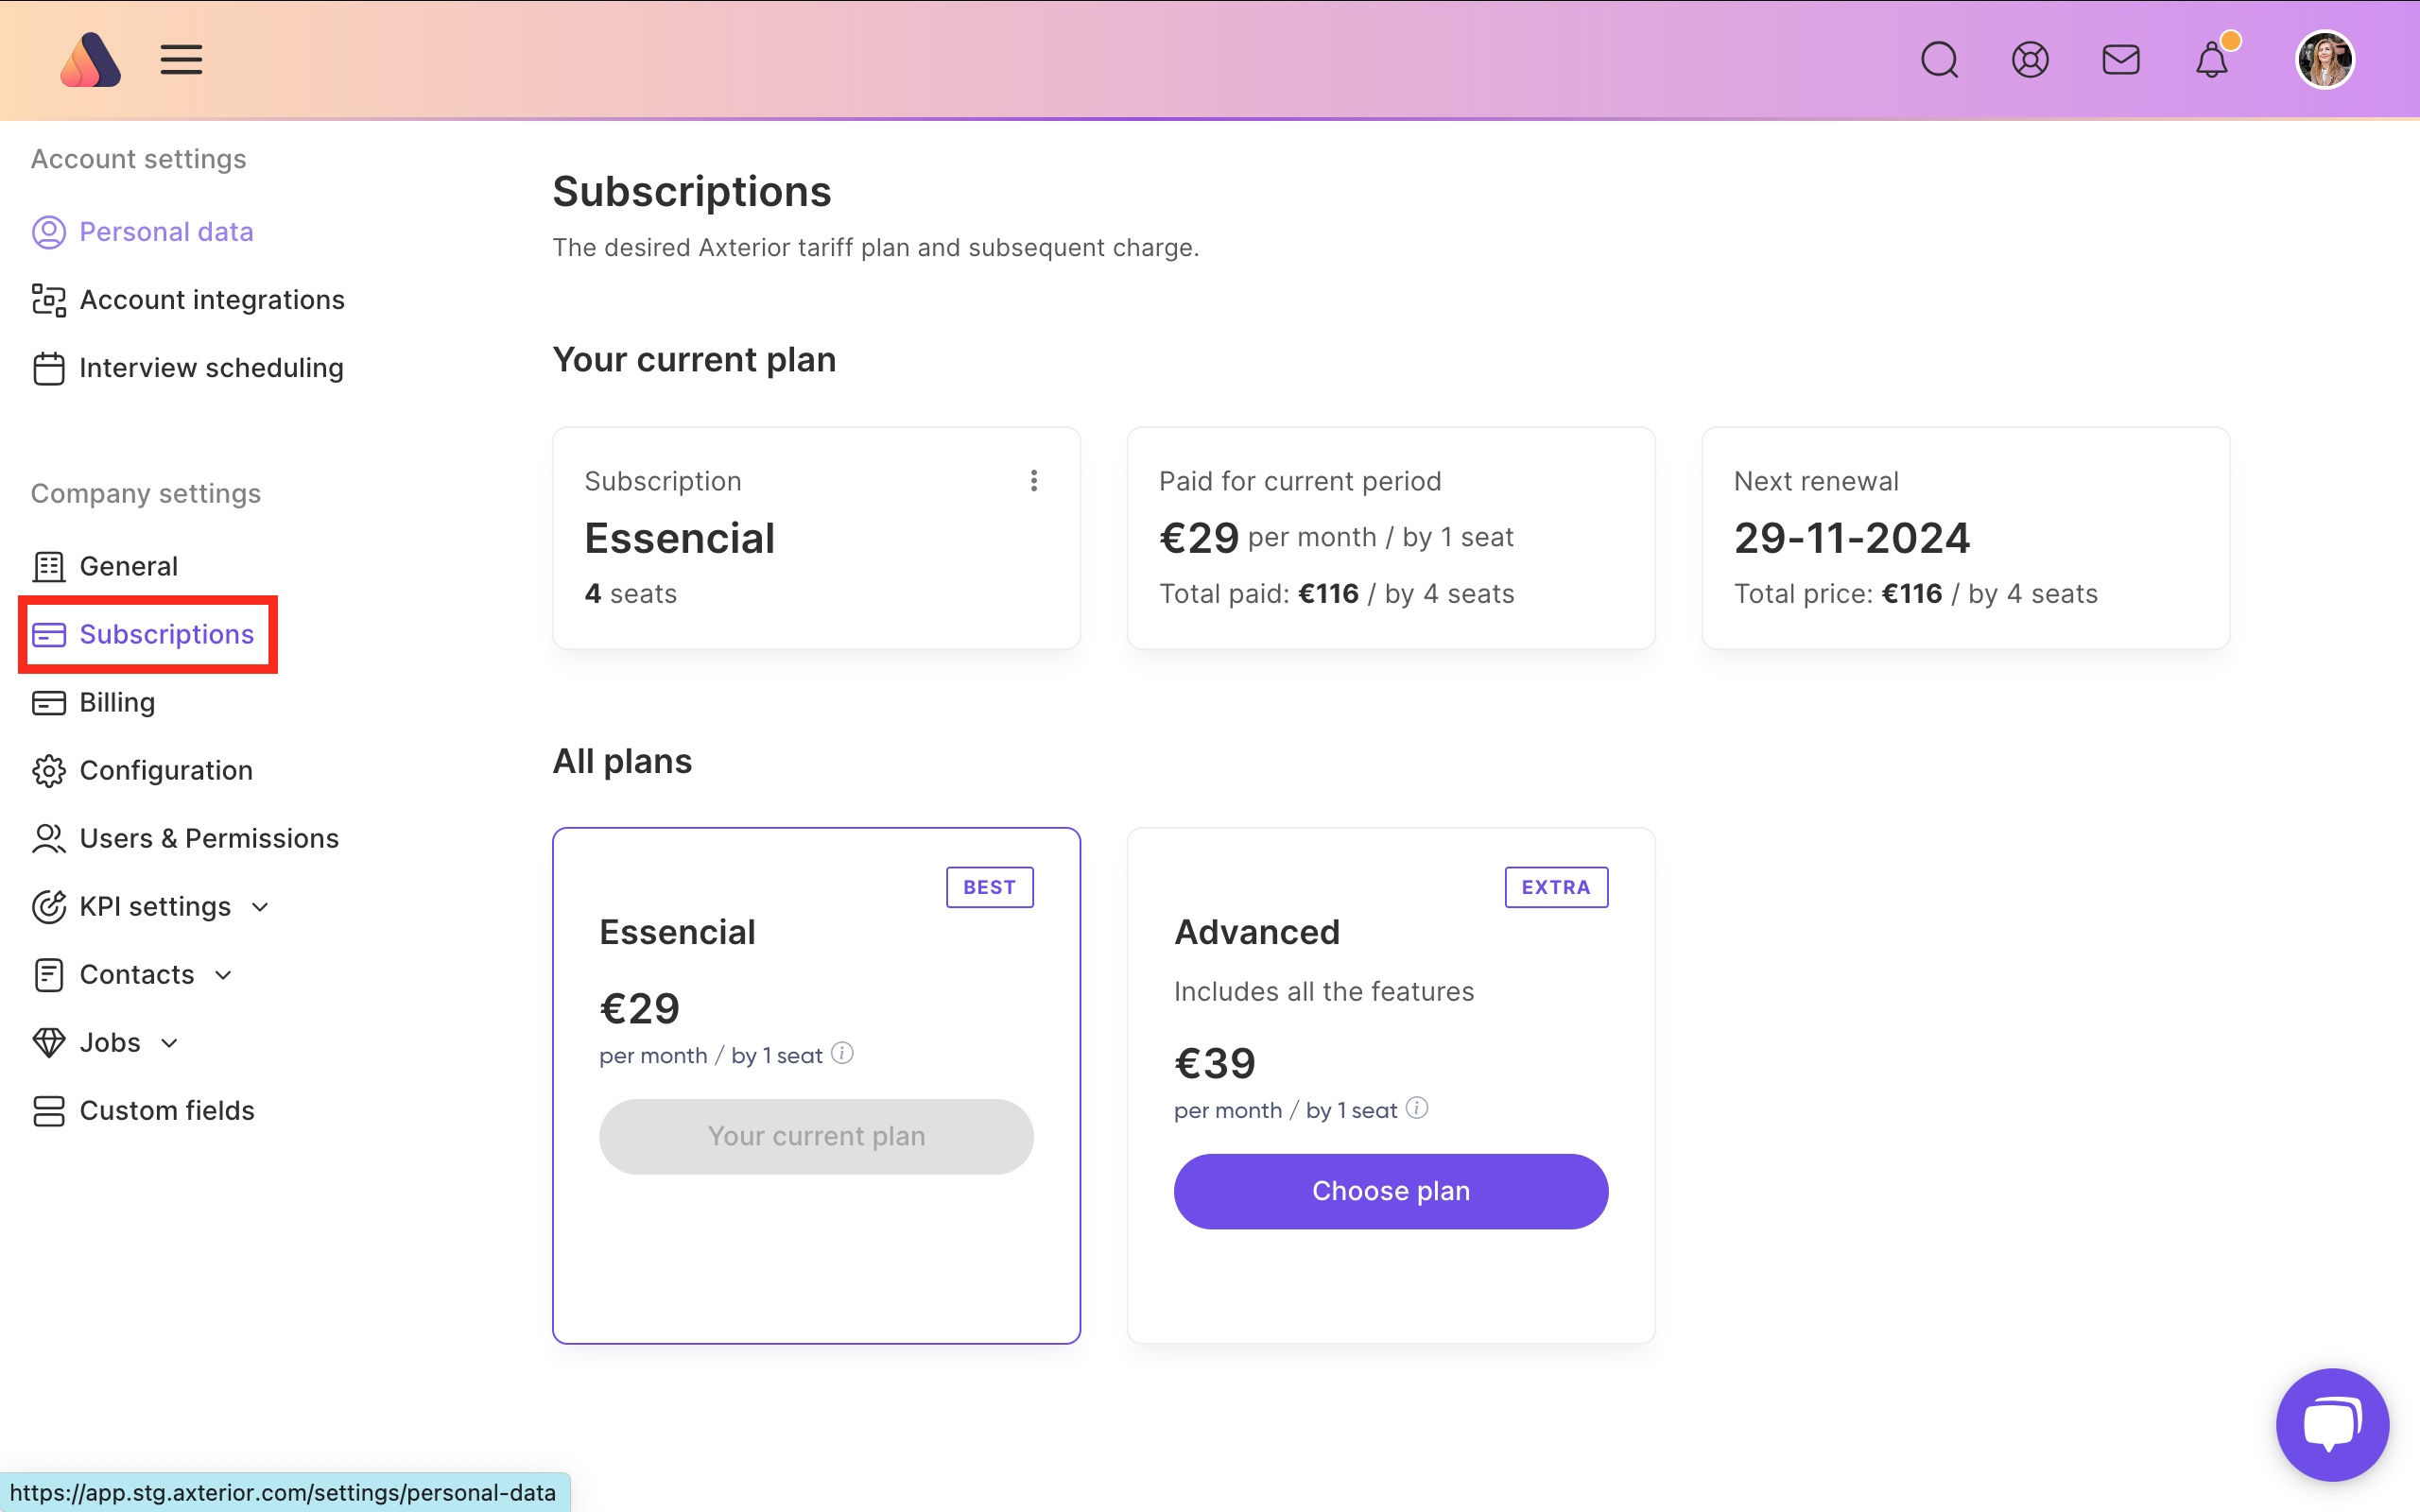
Next are Subscriptions. Choose your subscription plan here.
In the Billing you can add or edit Billing Address and Payme Method.

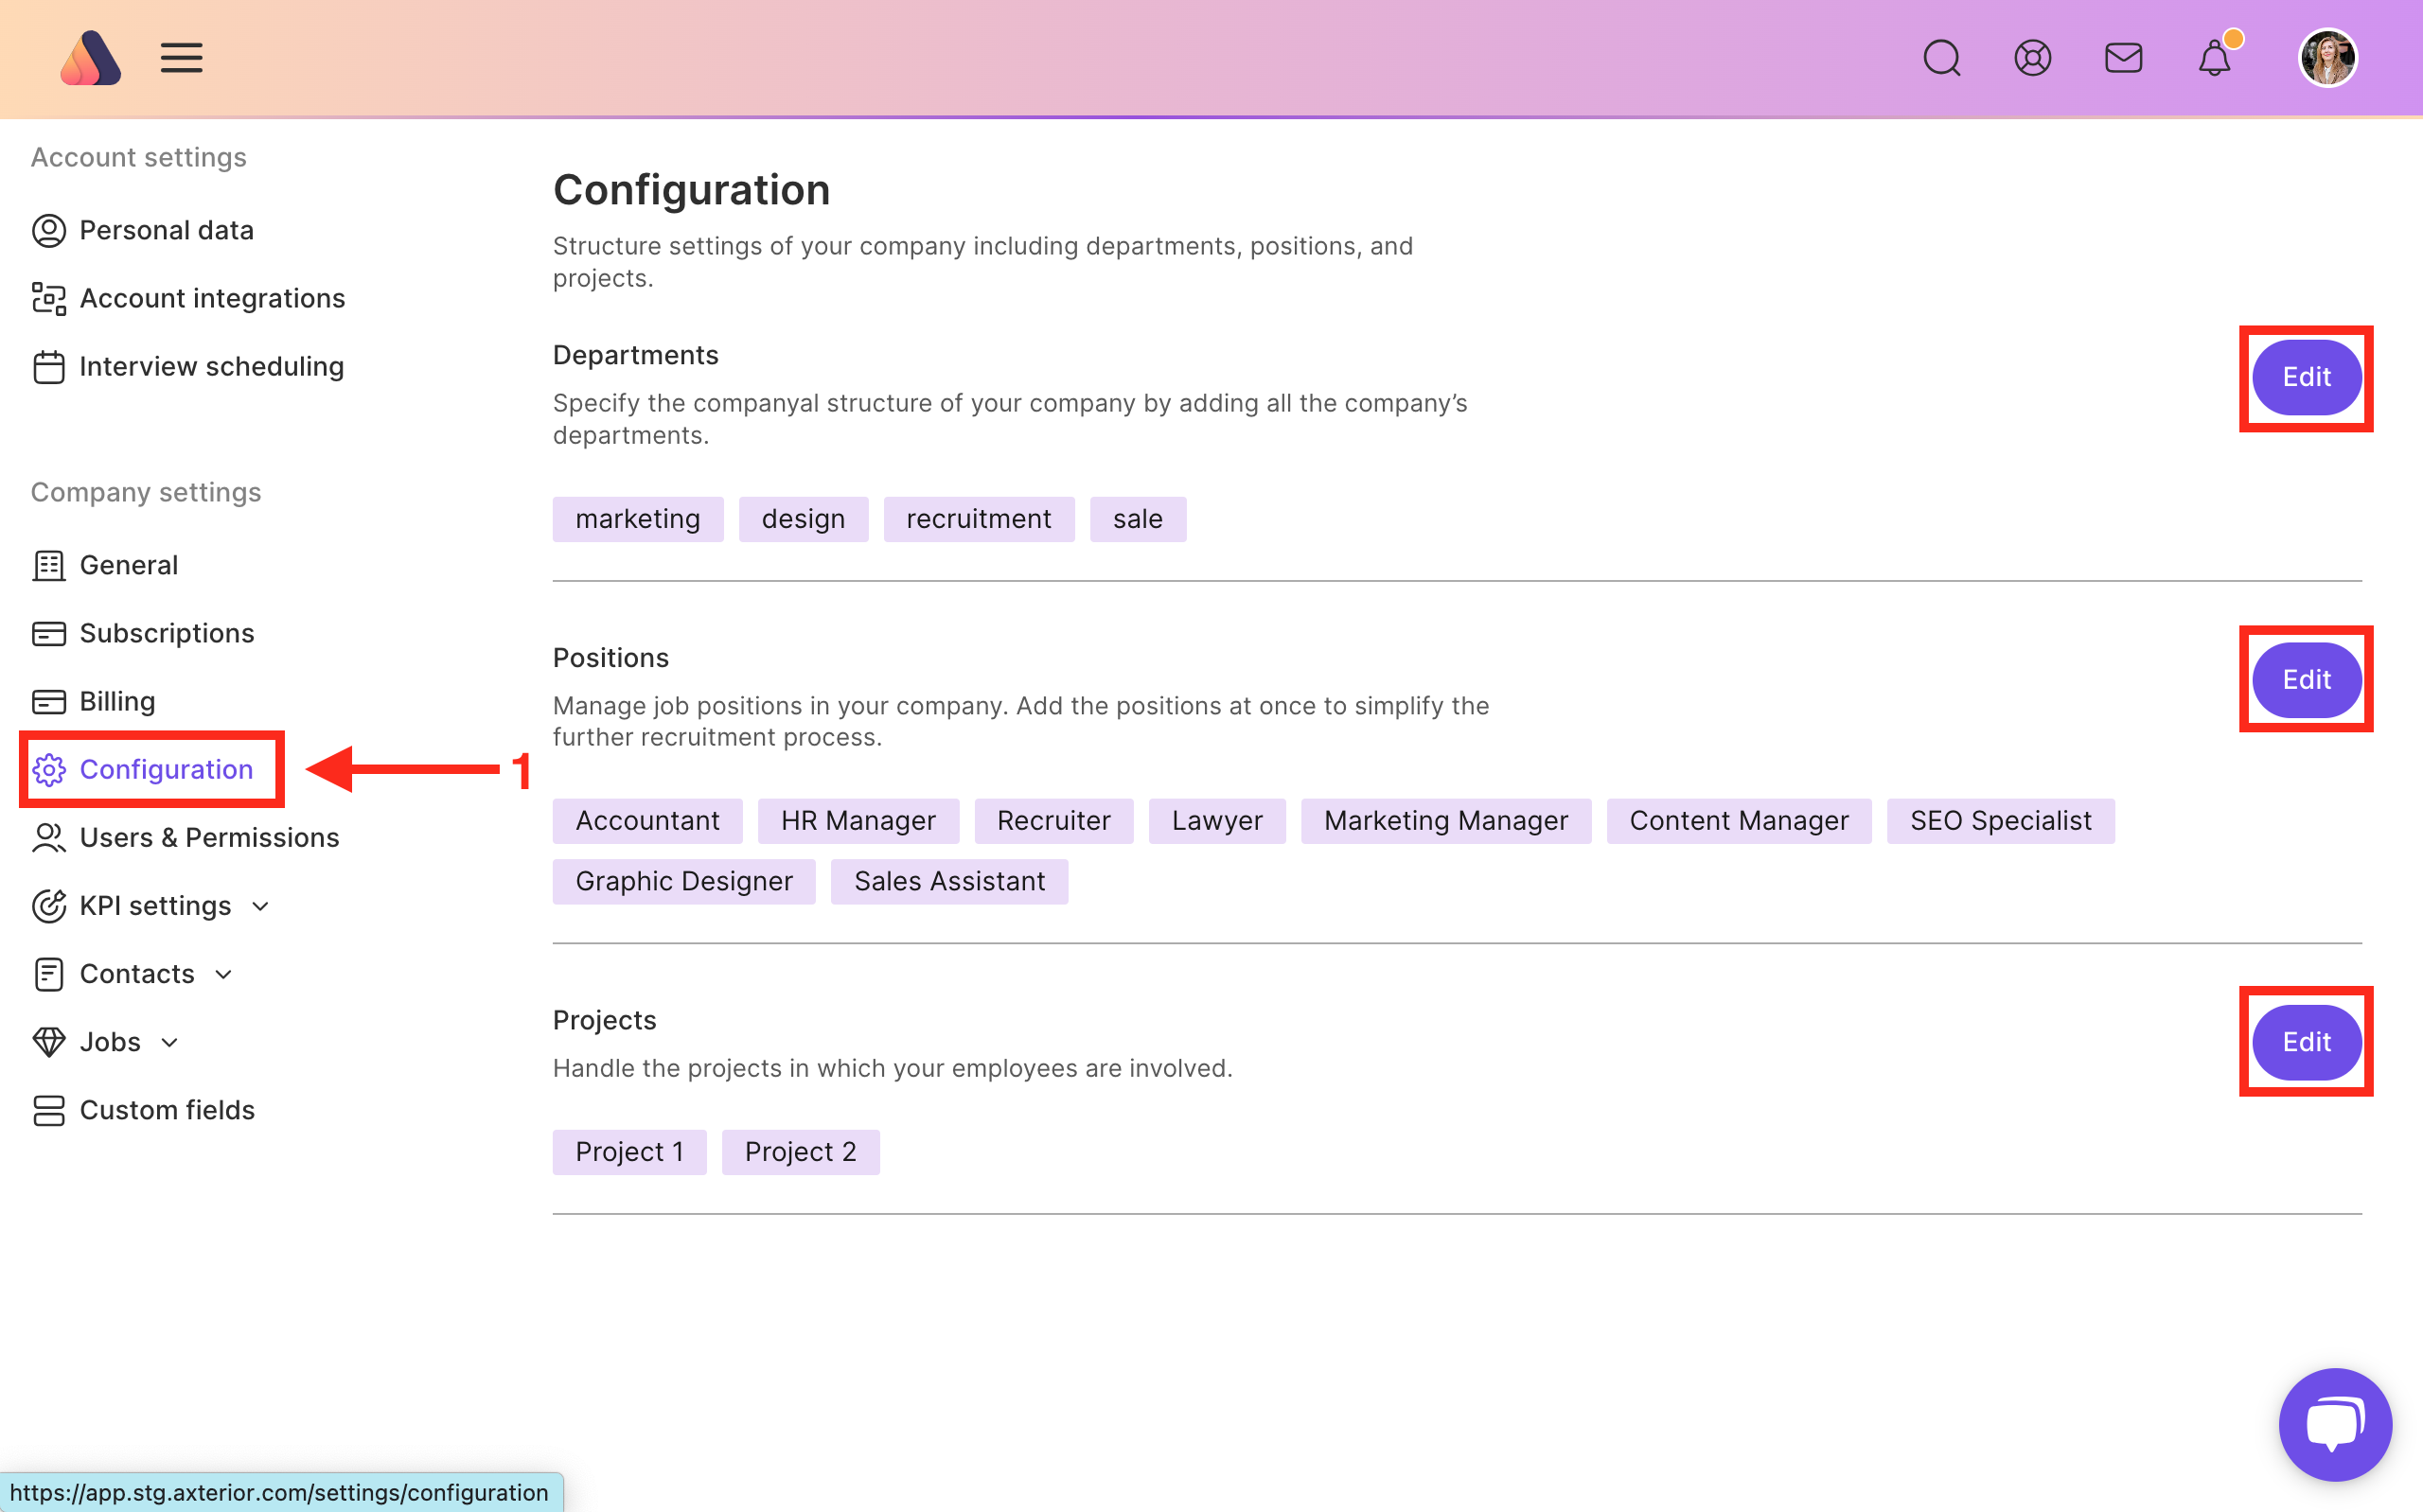
In Configurations are Departments, Positions, and Projects. Adding these settings will allow you to create candidates' profiles and jobs easier. To make changes, click on the Edit button near each category.
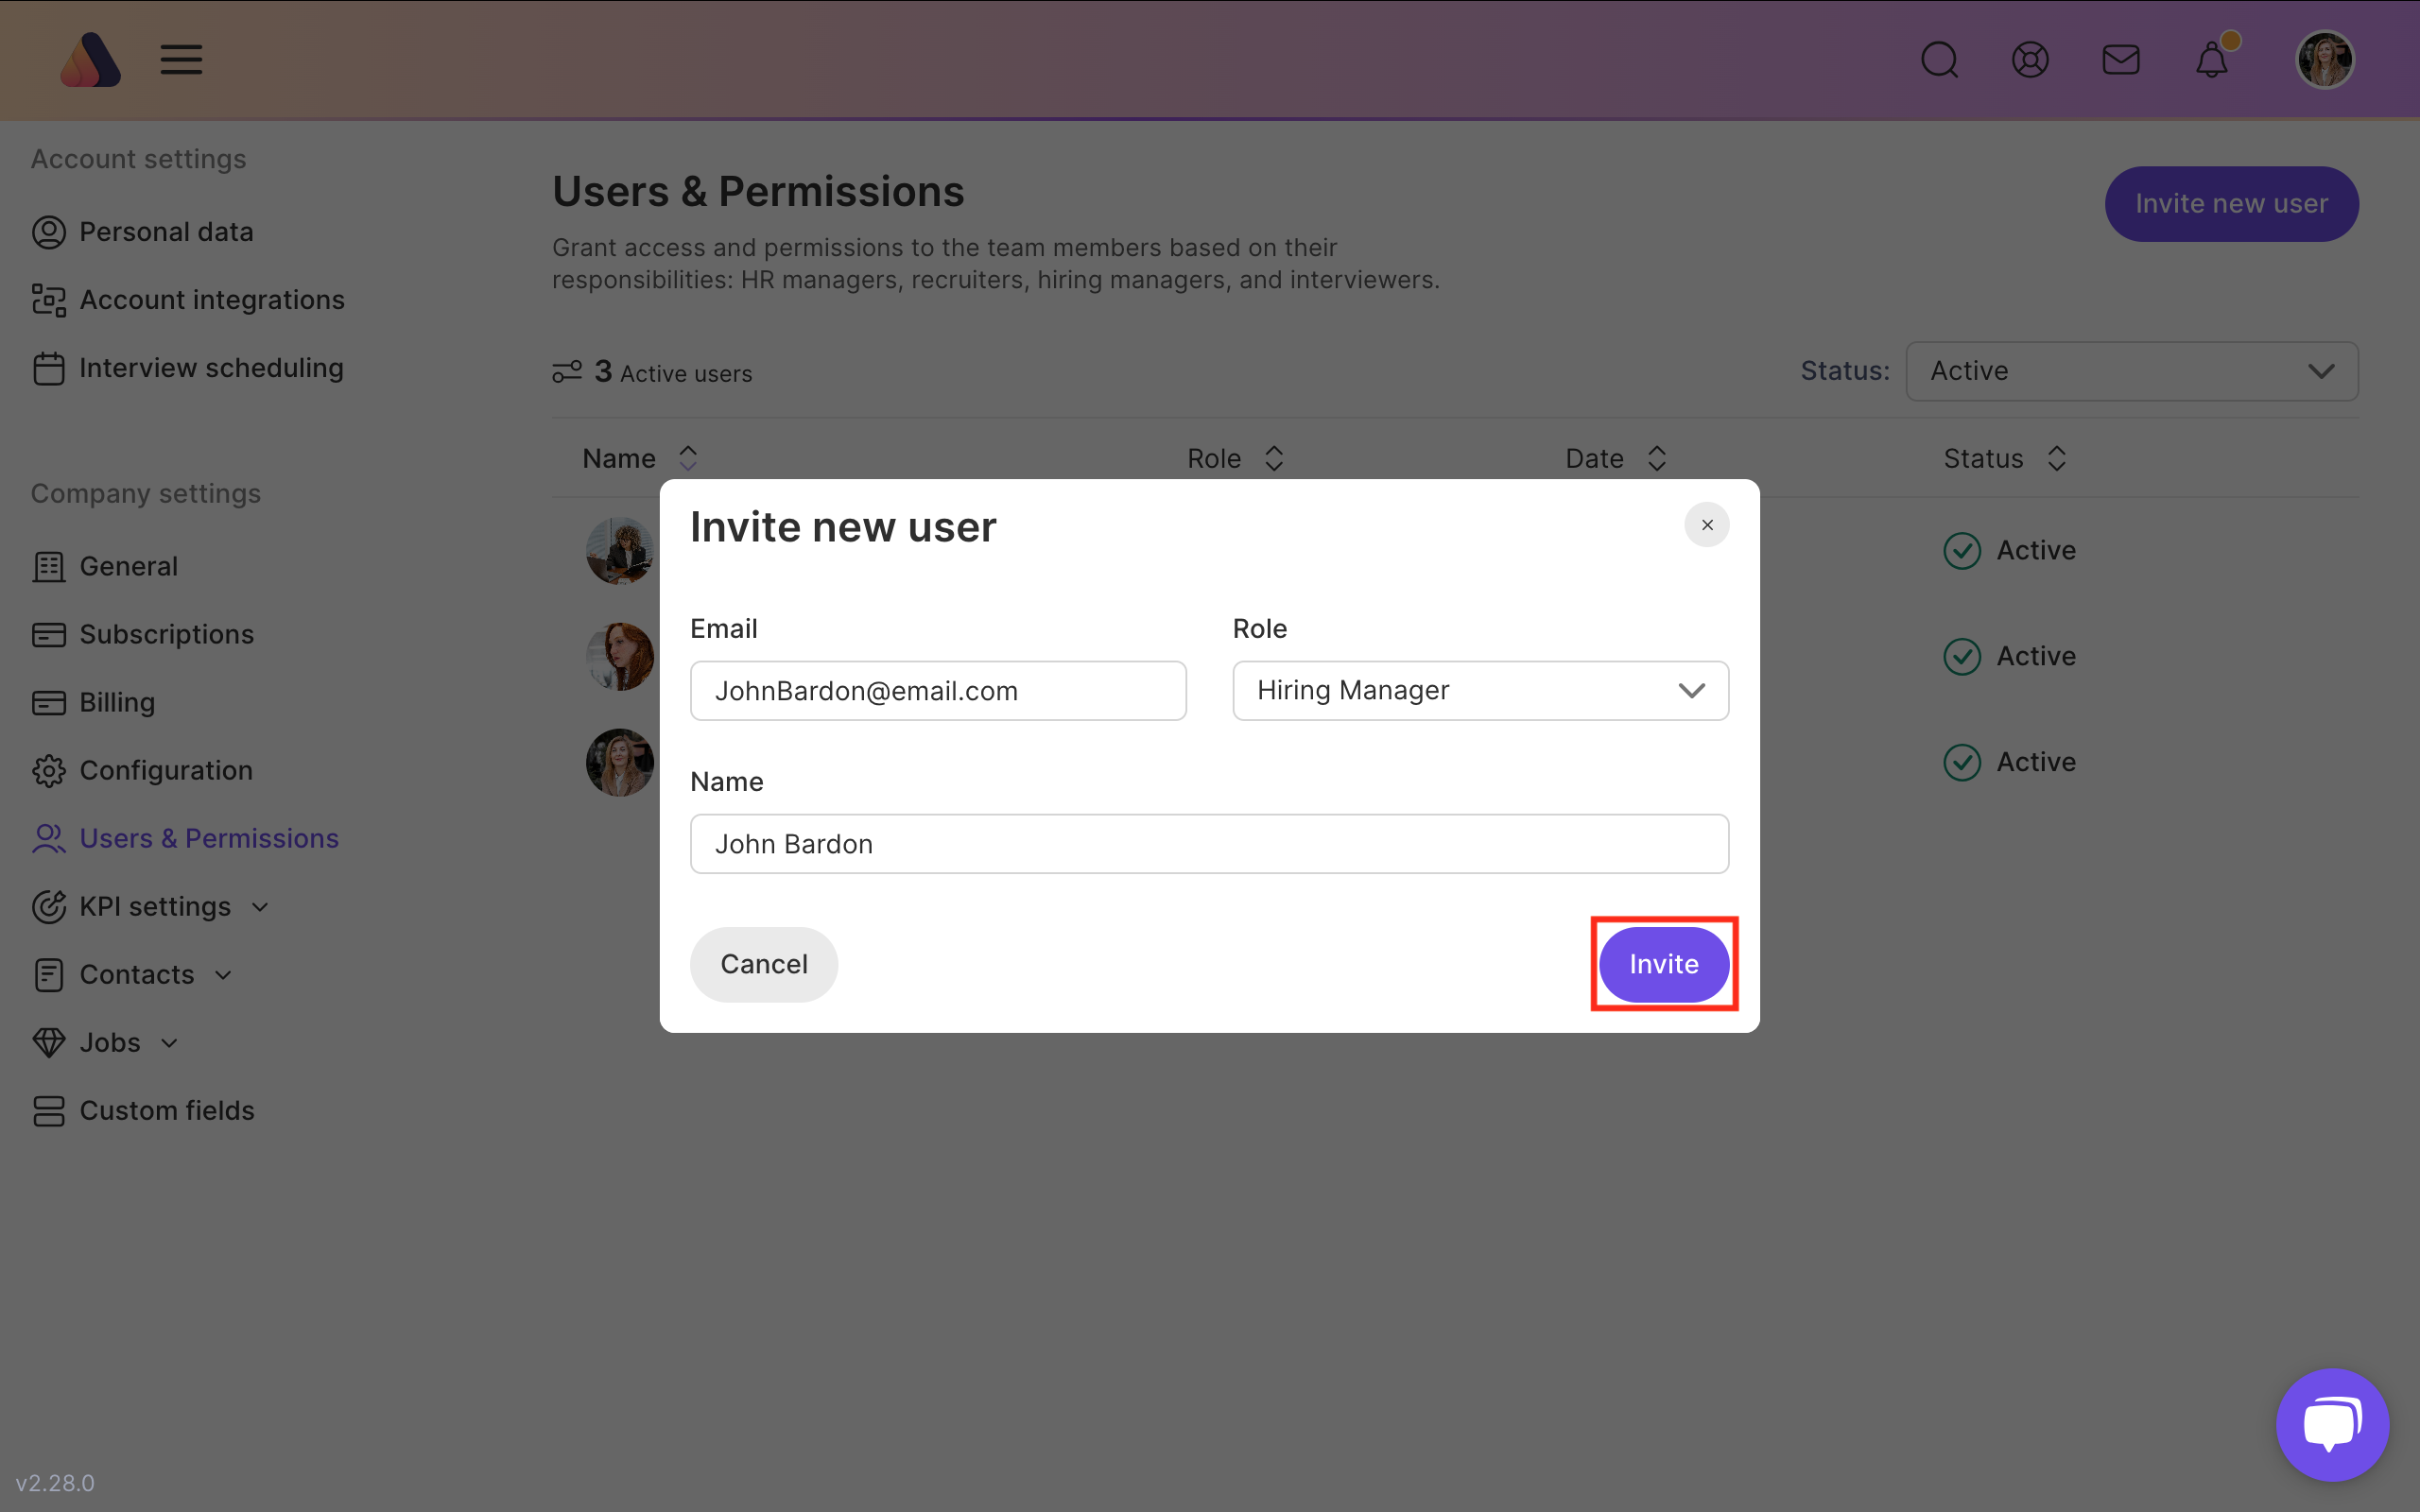
Users and permissions settings allow you to manage all team members in Axterior. You can grant access and permissions based on their responsibilities.
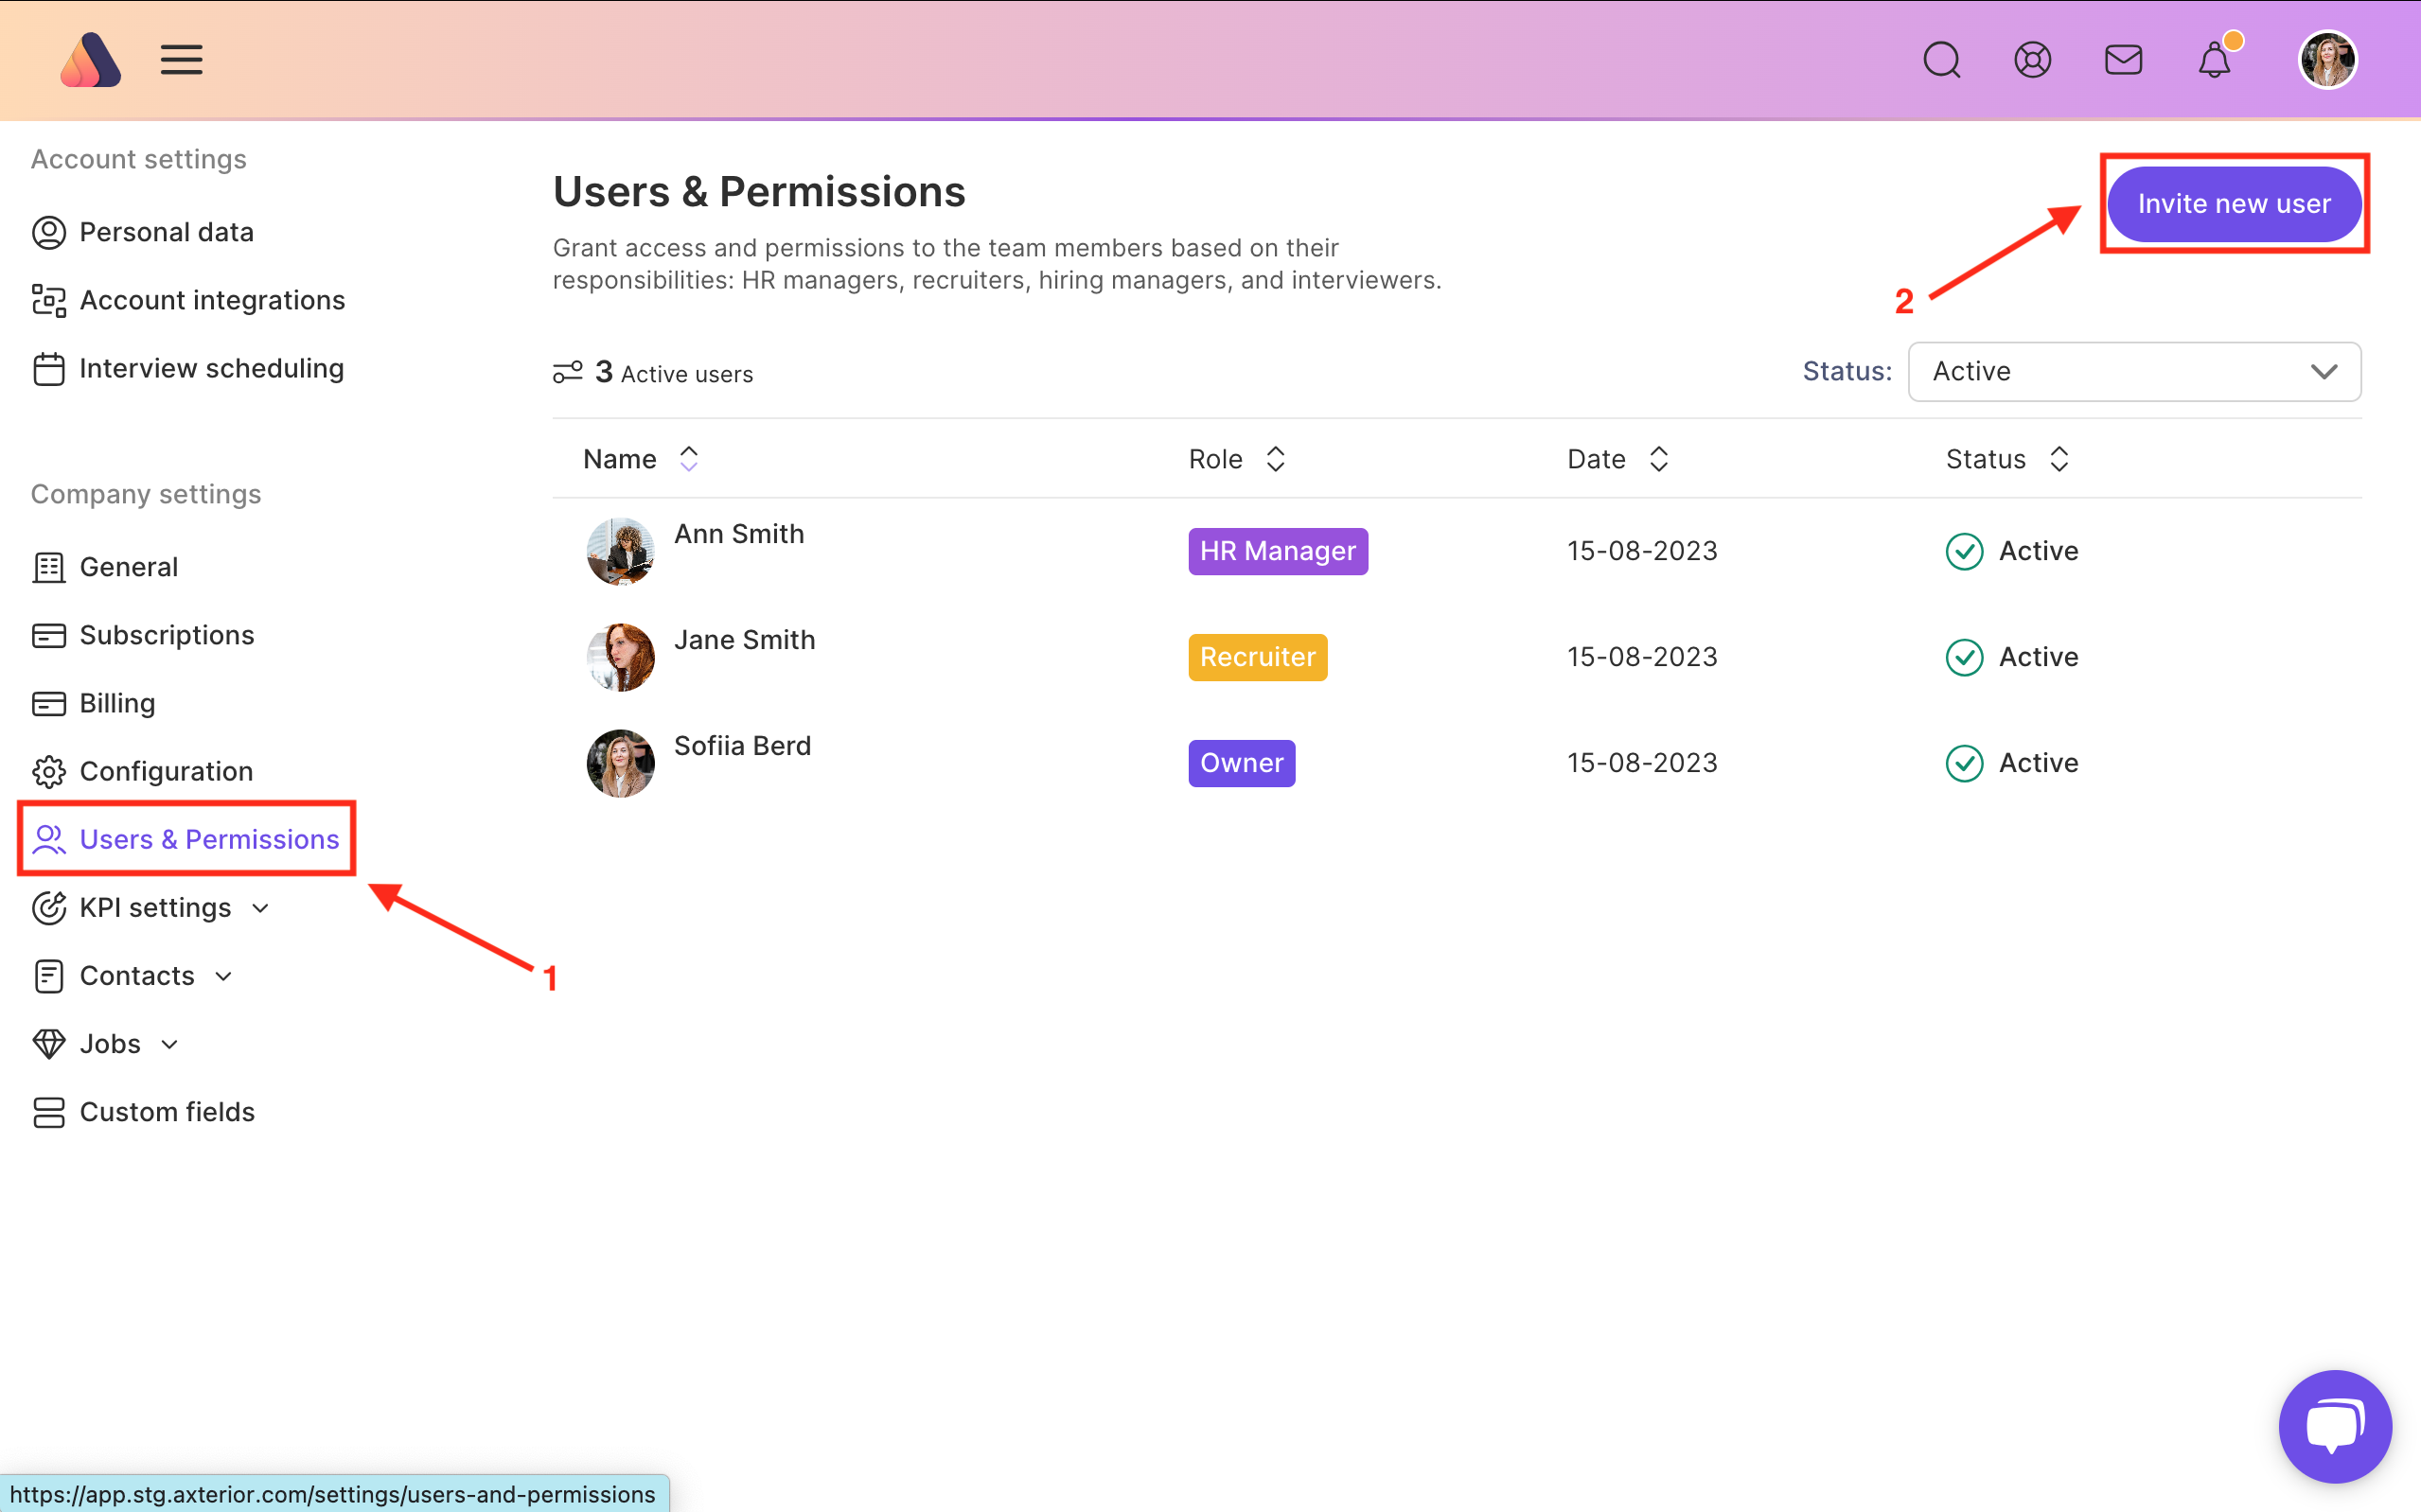
To make changes, click the Invite new user button in the top right corner. Insert their email, role, first name, and last name. When you finish editing, don’t forget to click the Invite button. The invited user will receive an invitation to join via email.
Now you can enjoy all the available functions of our software!
This was the last stage of organization set-up! You have finished the fundamental part of work with the Axterior recruitment platform. Don’t worry if you have missed something, you can always add some settings.


Bring Recruitment To The Professional Level!
Build a long-term relationship with candidates and hire best talents in the shortest term while Axterior automates the entire hiring process at your company.
No credit card required